Introduction
The InnovaPRO™ SDS10 is a compact, wireless OBD II and OEM-level diagnostic tool built for professional technicians. It pairs with the RepairSolutionsPRO® (RSPRO®) app via Bluetooth and turns your iOS or Android device into a full-capability diagnostic platform - covering all 10 OBD II modes, full-system scanning, bidirectional controls, security gateway access, and 14 workshop service functions.
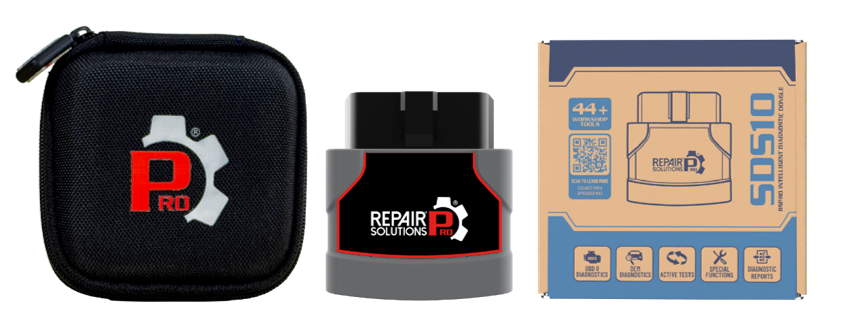
Unlike a standalone scan tool, the SDS10 has no screen of its own. All diagnostic interaction happens through the RSPRO® app. This means the first-time setup - downloading the app, creating an account, and pairing the dongle via Bluetooth - is a one-time process that must be completed correctly before any vehicle diagnostic work can begin.
This article walks through the complete first-time setup procedure from app download through successful Bluetooth pairing, and provides a reference guide to main buttons visible on the RSPRO® app’s Home Screen once the SDS10 is paired and vehicle information has been retrieved.
Before You Begin
Confirm the following items are available before starting the setup procedure:
SDS10 Dongle - included in the product package
Compatible mobile device - iOS 14 or later, or Android 6 or later
RepairSolutionsPRO® (RSPRO®) app - free download from the Apple App Store or Google Play Store
Account credentials - email address and password to create or log in to an RSPRO® account
Target vehicle - with key on, engine off (KOEO) for initial connection
First-Time Setup Procedure
Complete all steps in sequence. Steps 1 through 3 are one-time setup tasks. After pairing is complete, the SDS10 reconnects to the RSPRO® app automatically each time the dongle is plugged in and the app is opened.
Step 1: Download the RSPRO® App
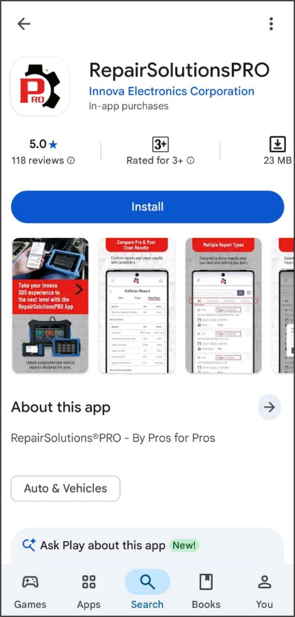
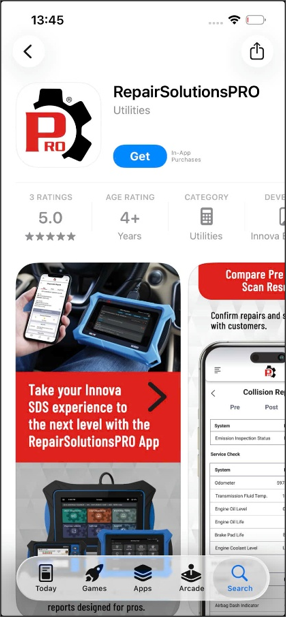
Download the RSPRO® app from the appropriate store for your device:
Apple App Store (iOS 14+): Search for "RepairSolutionsPRO®" - look for the black gear/PRO logo icon published by Innova Electronics Corporation.
Google Play Store (Android 6+): Search for "RepairSolutionsPRO®" - same app name and publisher.
Tap Install (Android) or Get (iOS), then wait for the download to complete before proceeding.
Step 2: Create or log in to Your RSPRO® Account
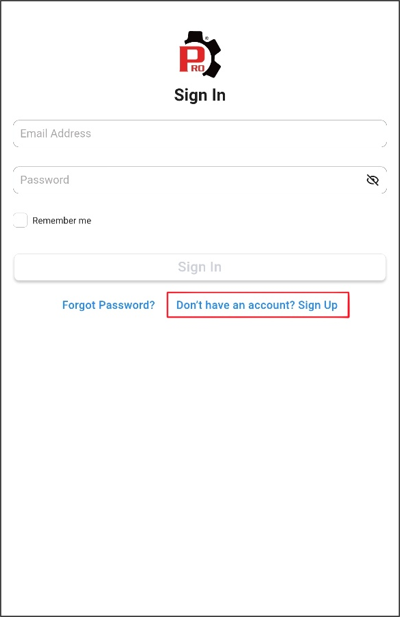
Open the RSPRO® app after installation completes. You will land on the Sign In / Sign Up screen.
If you already have an RSPRO® account, tap Sign In, enter your email and password, then proceed to Step 3.
If you are a new user, create an account:
Tap Don’t Have an Account? Sign Up on the Sign In screen.
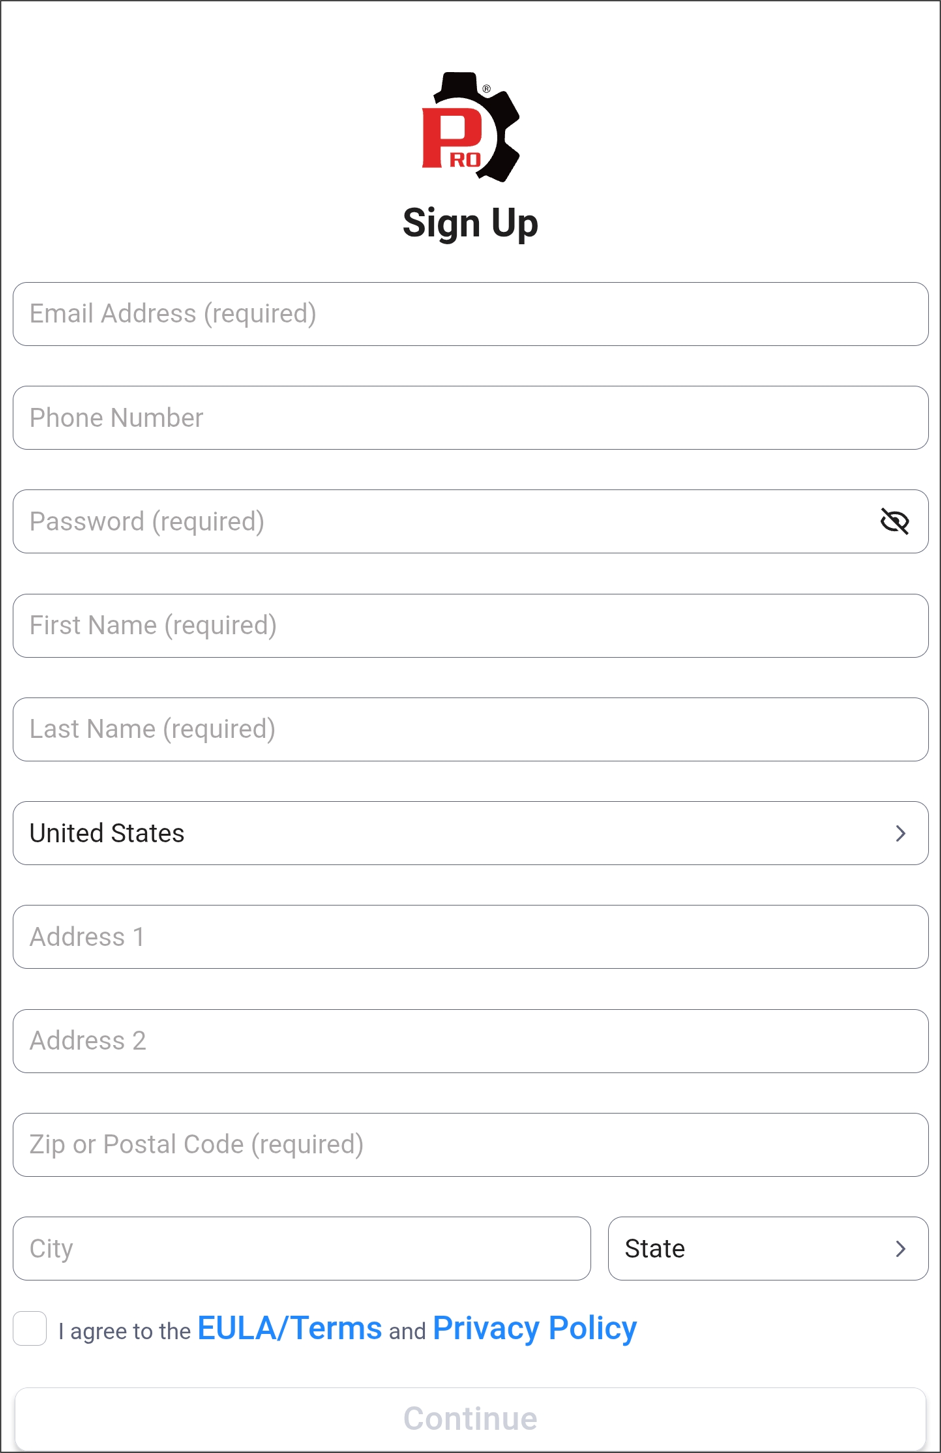
Enter your Email address (required), Phone number (optional), Password (required), and your First name, Last name (required), and Zip or postal code (required). Address fields (Address 1, Address 2, City, State) are optional. Check the I agree to the EULA/Terms and Privacy Policy checkbox. Tap Continue to sign up.
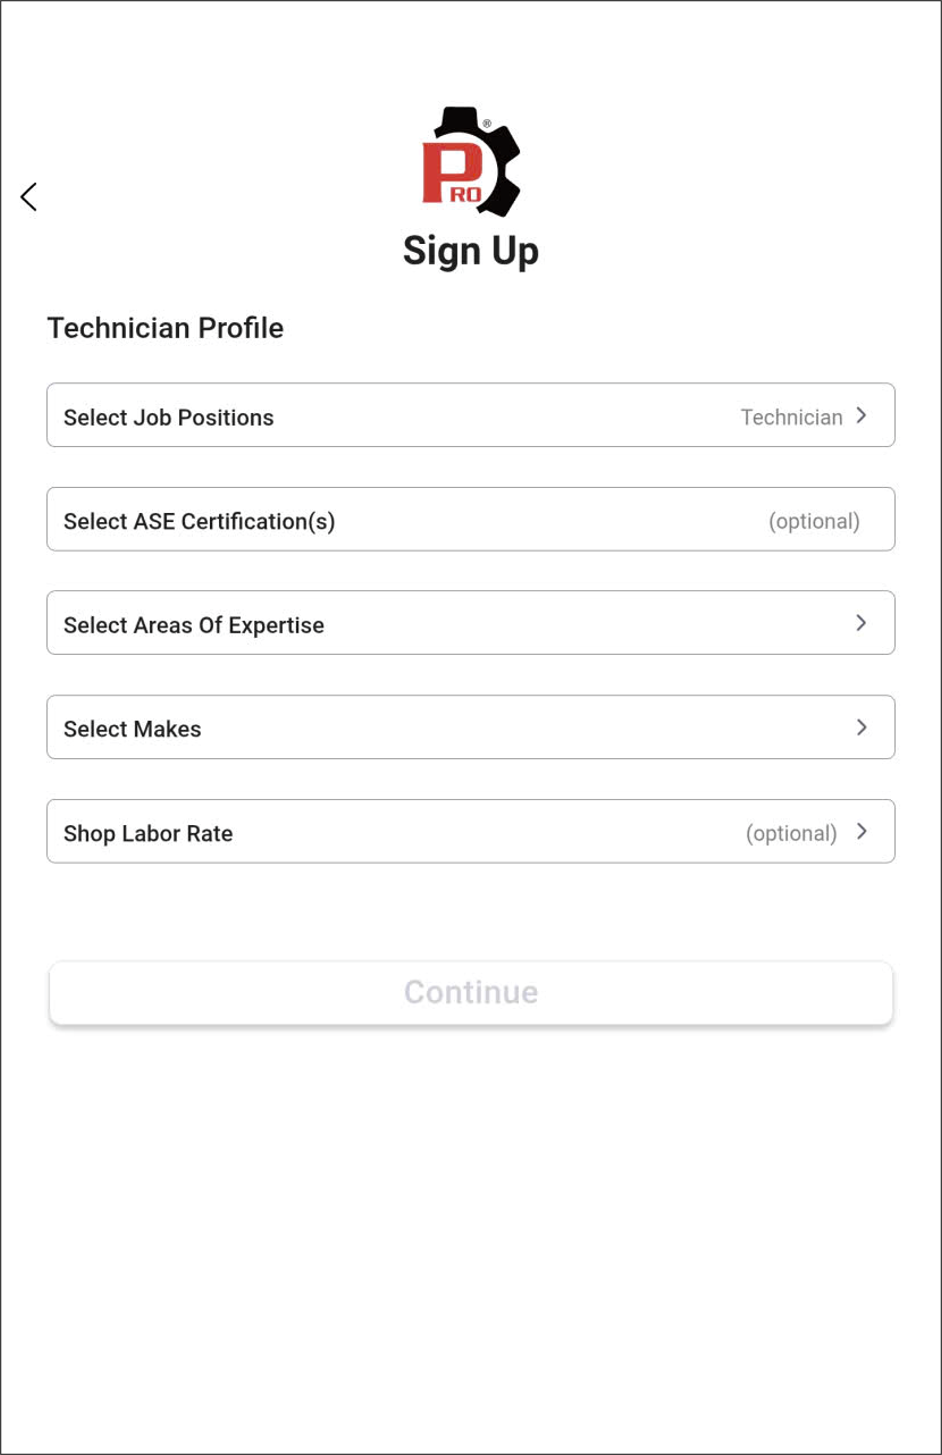
Select your Job Positions, ASE Certifications (optional), Areas of Expertise, Makes, and enter your Shop Labor Rate (optional) to complete the Technician Profile.
Step 3: Plug in the SDS10 and enable Bluetooth
NOTE: The SDS10 draws power directly from the vehicle's OBD II port. No charging or battery installation is required.
Locate the vehicle's OBD II diagnostic port - typically under the driver-side dashboard near the steering column.
Insert the SDS10 fully into the 16-pin OBD II port. The connector seats firmly in one orientation.
Turn the vehicle ignition to Key On, Engine Off (KOEO). The SDS10 powers on and its Bluetooth module activates.
On your mobile device, verify Bluetooth is enabled in device Settings.
NOTE: Do not pair the SDS10 directly through the device's Bluetooth Settings menu. Pairing is completed exclusively through the RSPRO® app in Step 4.
Step 4: Pair the SDS10 via the RSPRO® App
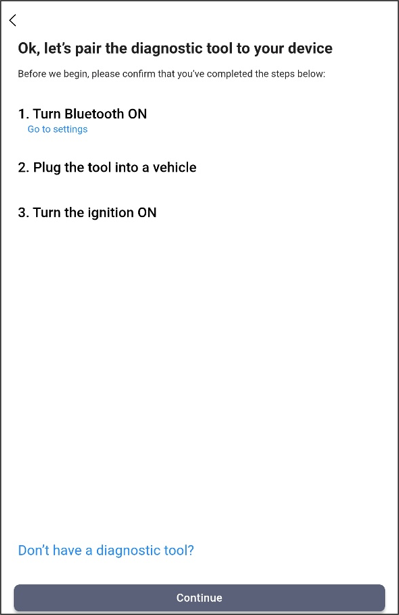
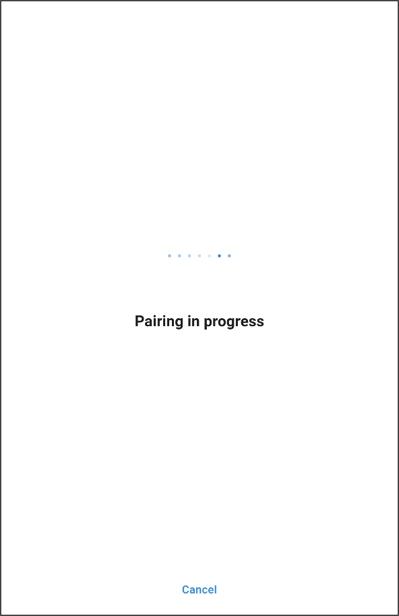
After signing in, the RSPRO® app will automatically prompt you to connect a diagnostic tool. Follow these steps to complete Bluetooth pairing:
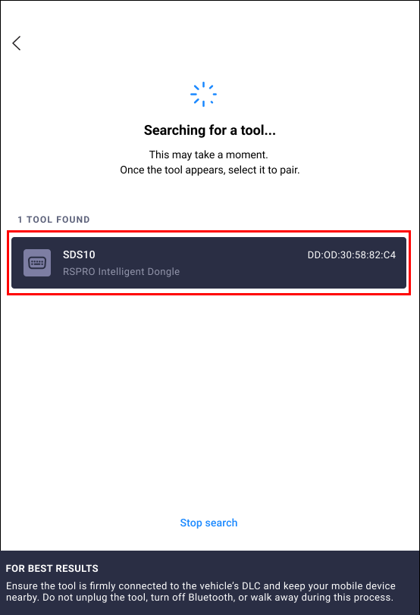
Tap Continue, the app scans for available Bluetooth devices. The SDS10 will appear in the list.
Tap the SDS10 entry to initiate pairing.
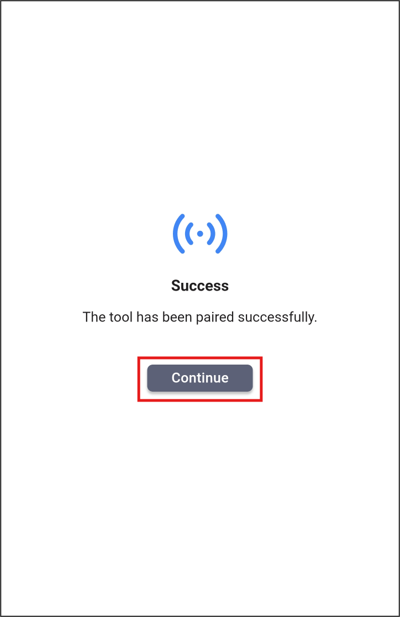
When pairing completes, the app shows a "Your tool has been paired successfully" confirmation screen. Tap Continue, the app then shows some SDS10 general information.
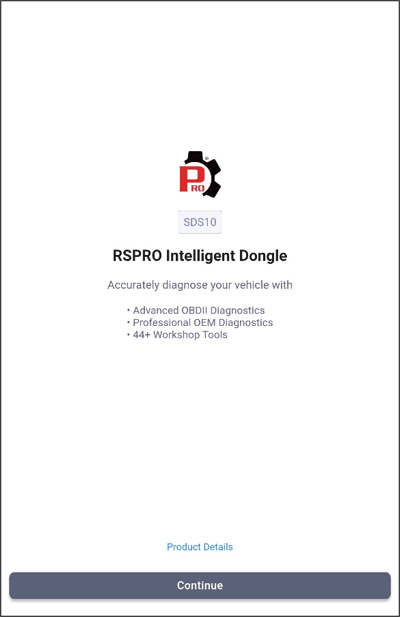
NOTE: If the tool shows as disconnected, verify that the SDS10 is fully seated in the OBD II port, the vehicle ignition is on (KOEO or engine running), and Bluetooth is active on your device.
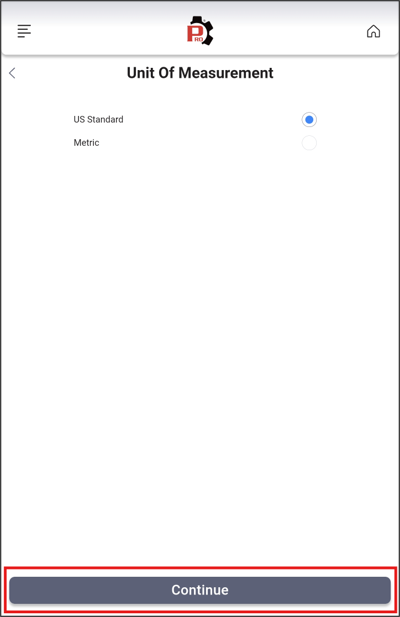
Tap Continue, the app requests to select Unit of Measurement. Select the desired unit, then tab Continue.
Select the desired location for the Smog Check or I/M Program, then tab Save.
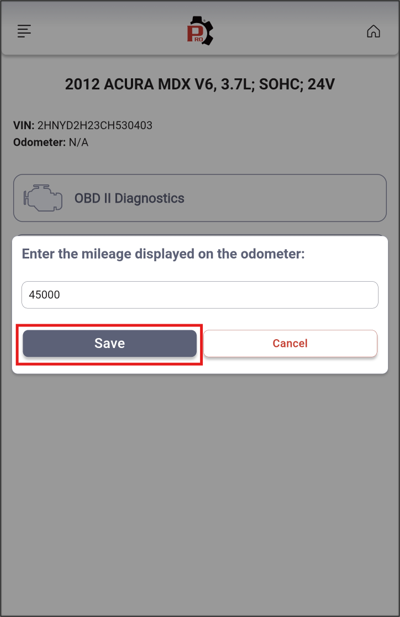
- The pairing process is complete. The SDS10 is now successfully paired to the RSPRO® app.
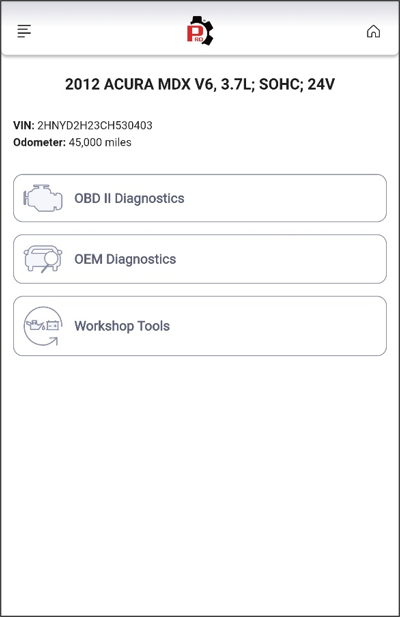
NOTE: On subsequent uses, plug the SDS10 into the OBD II port, open the RSPRO® app, and the tool will reconnect automatically via Bluetooth. No repeat pairing is required unless the app data is cleared or the tool is paired to a new device.
Home Screen and Main Button Functions
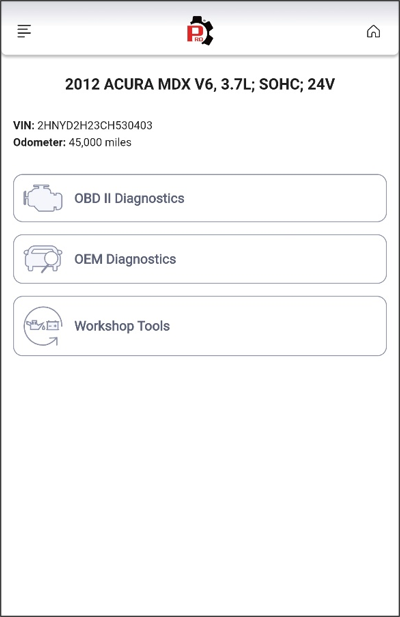
Once the SDS10 is paired and connected, the RSPRO® app Home Screen is the starting point for all diagnostic work. The Home Screen provides access to OBD II Diagnostics; OEM Diagnostics; and Workshop Tools.
Home Screen - after vehicle pairing
The Home Screen displays the confirmed vehicle identity at the top - Year, Make, Model, Engine, VIN, and Odometer reading - and presents three primary diagnostic access buttons below.
OBD II Diagnostics
Tapping OBD II Diagnostics launches the standardized Global OBD II diagnostic interface. This mode covers all 10 OBD II diagnostic services as defined under SAE J1979, accessed through the 16-pin OBD II port.
With the SDS10, this mode supports reading and clearing stored, pending, and permanent Diagnostic Trouble Codes (DTCs); viewing freeze frame data; checking I/M Readiness monitor status across all supported monitors; streaming and graphing OBD II live data PIDs; reviewing Mode $06 on-board monitor test results; pulling vehicle information via Mode $09 (VIN, CALID, CVN, IUMPT/IUMPR data); and confirming emissions readiness status for state SMOG/OBD inspection.
OEM Diagnostics
Tapping OEM Diagnostics accesses vehicle-manufacturer-specific diagnostic data beyond the standardized OBD II service set. This mode reads from control modules across all vehicle systems - not just the powertrain - using OEM-proprietary communication protocols and PIDs.
The SDS10 delivers full-system OEM-level scanning across Engine, Transmission, ABS, SRS/Airbag, Body, Chassis, TPMS, and all other accessible modules on the target vehicle. Code Priority and Code Severity Alert classifications help identify which DTCs require immediate attention. OEM-level Enhanced Live Data streams real-time parameters from all systems simultaneously, with graphing capability. The SDS10 also supports OEM ECU Information retrieval (SID #22 and SID #1A), Secure Gateway unlock for FCA and Nissan vehicles, and Ford ECU Security Access - enabling access to modules that restrict standard OBD II tools.
Workshop Tools
Tapping Workshop Tools opens the SDS10’s library of 14 dealer-level service functions. These are active, bidirectional procedures that go beyond reading data - they send commands to vehicle control modules to perform resets, relearns, calibrations, initializations, and self-tests.
Workshop Tools covers the most common service operations required after maintenance or component replacement, organized by category. Available service functions include:
- Resets: Battery Reset, Battery Initialization, Oil Maintenance Reset, Electronic Parking Reset, Maintenance Reset, Transmission Reset, Transmission Fluid Change Reset, DPF Reset.
- Relearns: Throttle Body Relearn/TEC Learn, TPMS Relearn Procedure/TPMS Relearn OBD.
- Routines: ABS Bleeding, Transmission Fluid Level Check.
- Calibrations: Steering Angle Sensor Calibration, Suspension Calibration.
Conclusion
The SDS10 first-time setup is a one-time process: download the RSPRO® app, create or sign in to an RSPRO® account, plug the dongle into the OBD II port, and complete Bluetooth pairing through the app. Once paired, the SDS10 reconnects automatically on each subsequent use.
From the RSPRO® app Home Screen, the three main diagnostic buttons - OBD II Diagnostics, OEM Diagnostics, and Workshop Tools - provide direct, organized access to the full diagnostic capability of the SDS10.
For additional guidance on using specific diagnostic functions, service procedures, or scan reporting with the SDS10, visit the Support section at pro.repairsolutions.com
Disclaimer
This content is subject to change without notice. The information has been carefully reviewed and is believed to be accurate based on our research and findings. It is intended as a guide, not a definitive procedure. We accept no responsibility for inaccuracies. Vehicle-specific test settings may be required.
Copyright 2026 IEC. All rights reserved

