Introduction
Maintaining a vehicle's charging system is essential for keeping the battery fully charged and ensuring all electrical components function properly. The Charging System Analysis function on the Battery Tester Module is designed to perform a thorough check of the alternator or generator's output. It measures both the output voltage and ripple voltage under different conditions, such as with electrical loads, without loads, and at various engine speeds. This analysis helps identify potential issues early, ensuring the charging system operates efficiently. This article explains how to use the Charging System Analysis function on the Battery Tester Module.
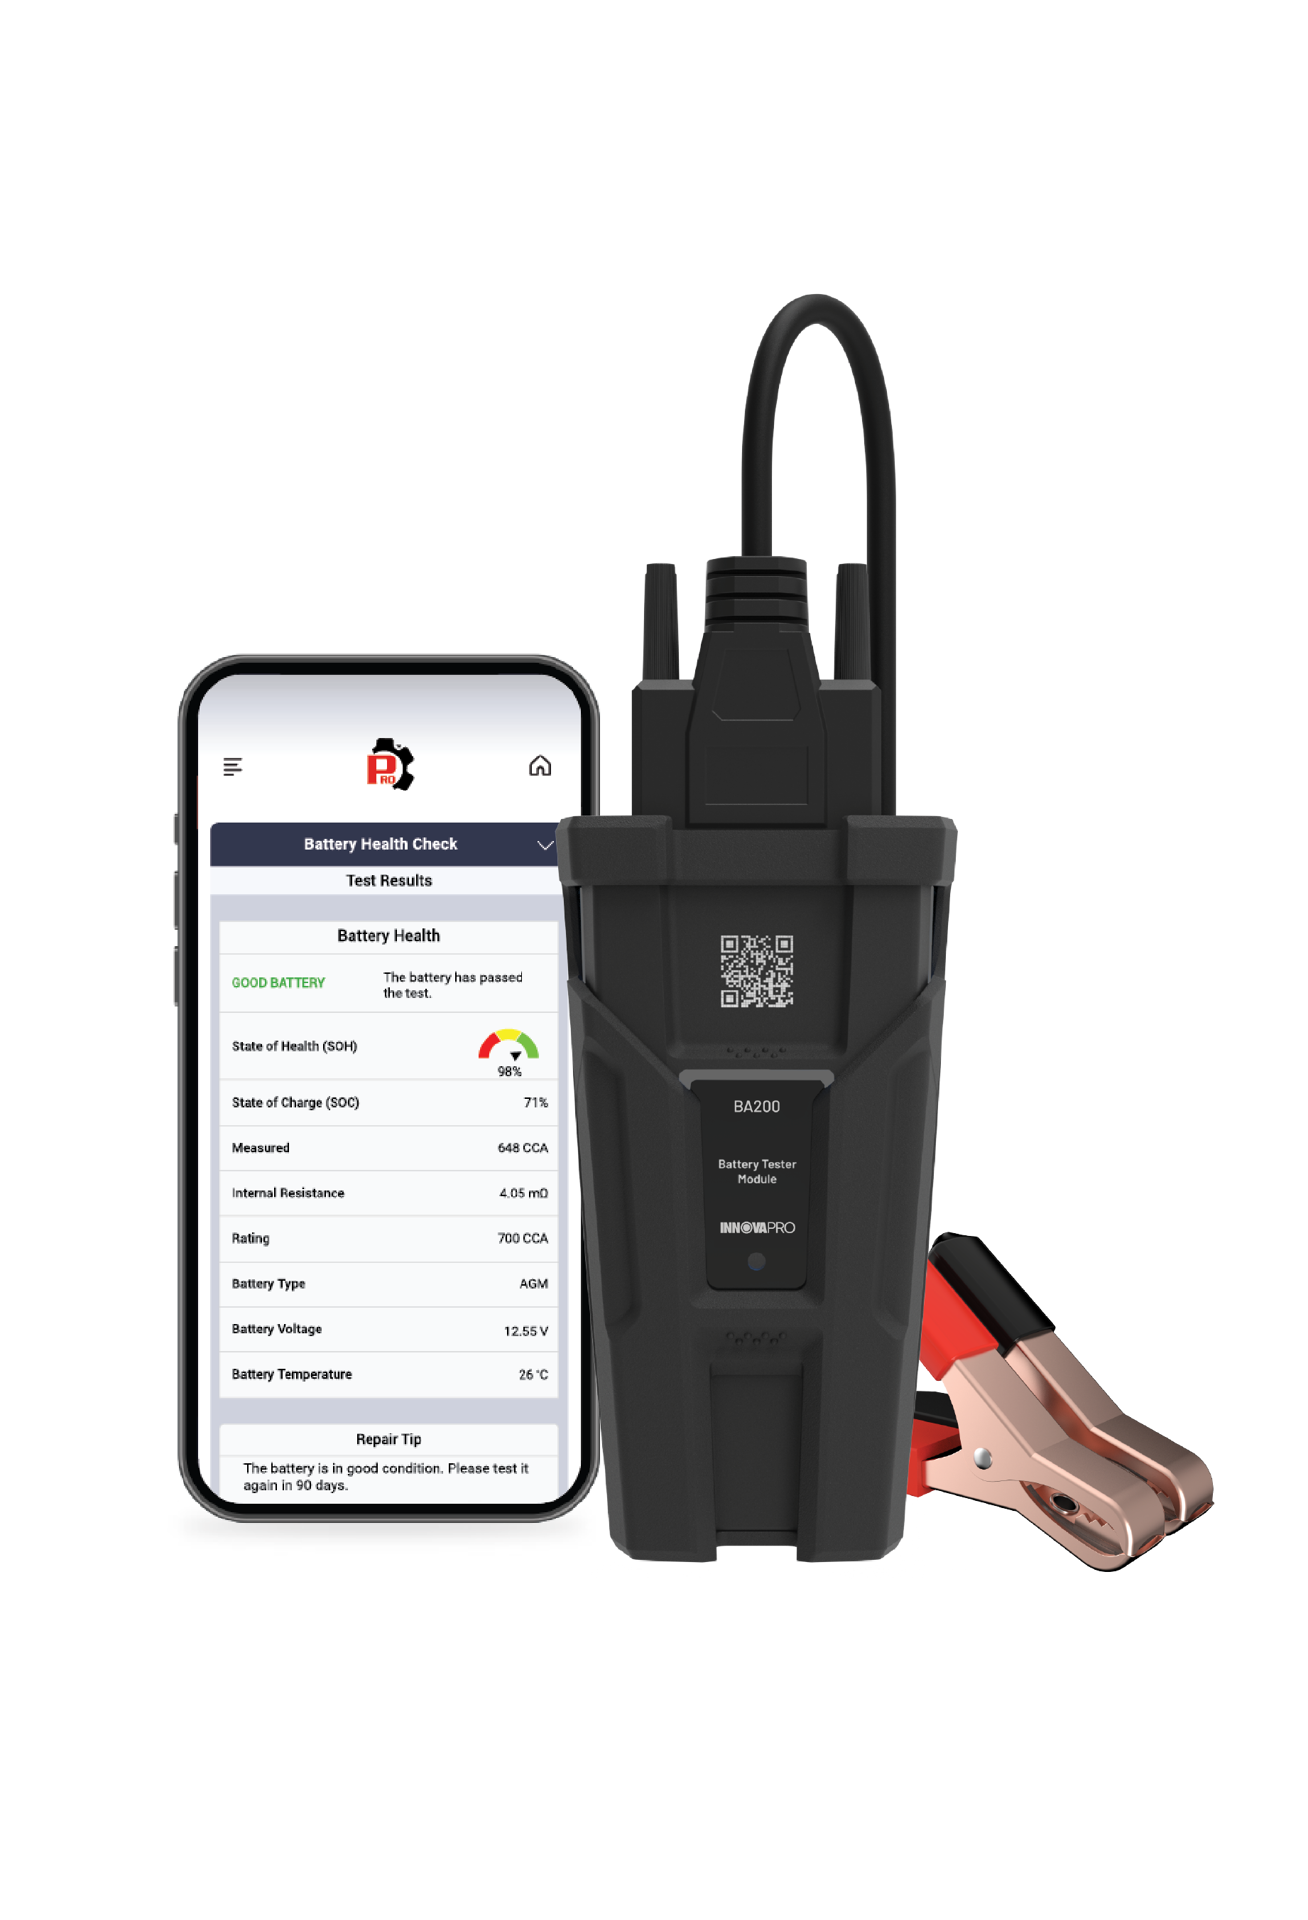
Warning: Do not perform this test on Smart Alternator, Hybrid, or Electric vehicles.
Instructions
NOTE: Inspect the battery terminals for sulfate deposits and other corrosion. Use a brush to thoroughly clean the terminals before connecting the Battery Tester Module.
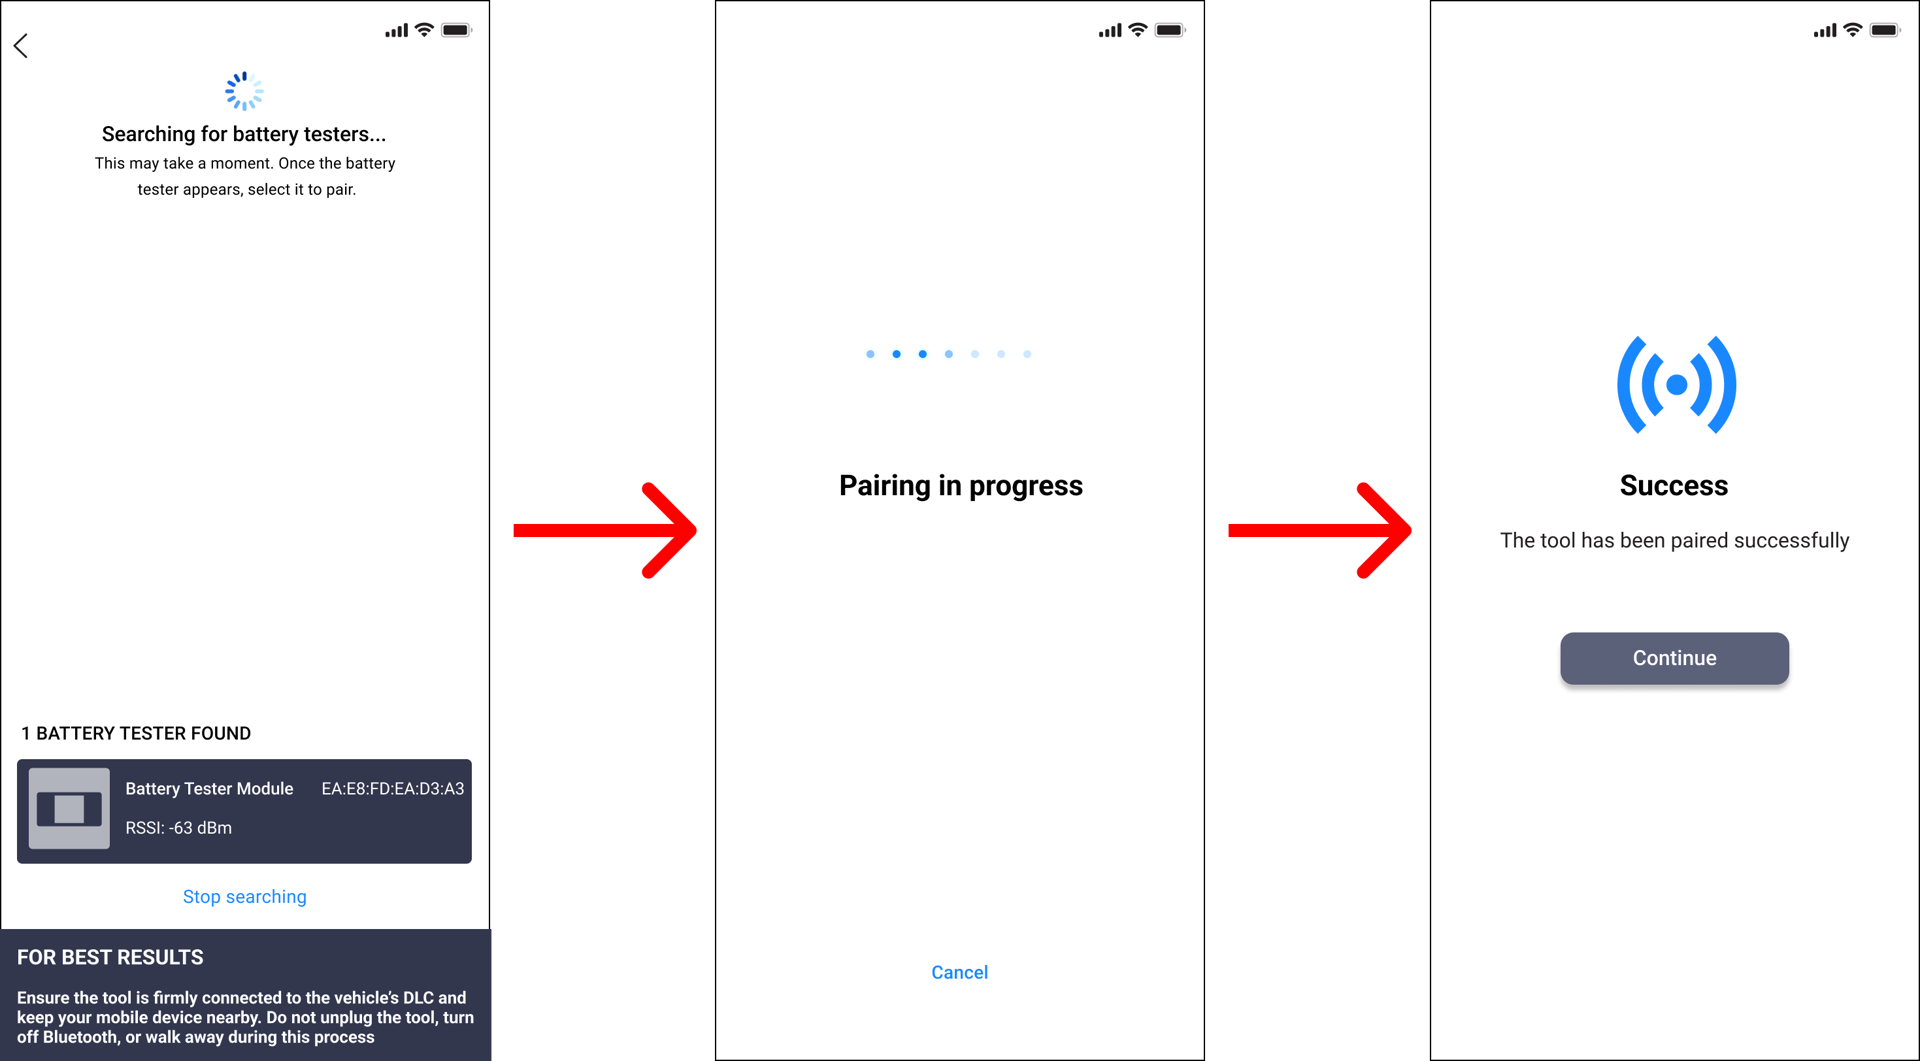
Step 1: Connect the Battery Tester Module with the RSPRO® App.
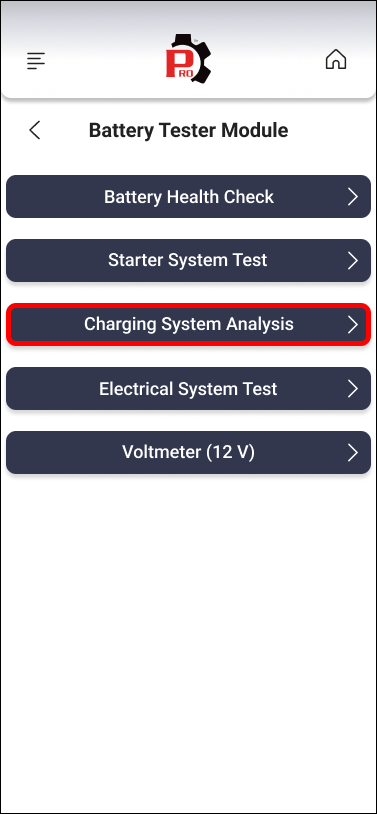
Step 2: Tap Charging System Analysis in the Battery Tester Module menu.
NOTE: If battery voltage is less than 11.8V, the message ‘Charge the battery and retest’ displays, indicating that the battery needs to be charged before trying again. Deliberately starting the engine with a low battery for an extended period can lead to deep discharge, potentially damaging the battery beyond recovery.
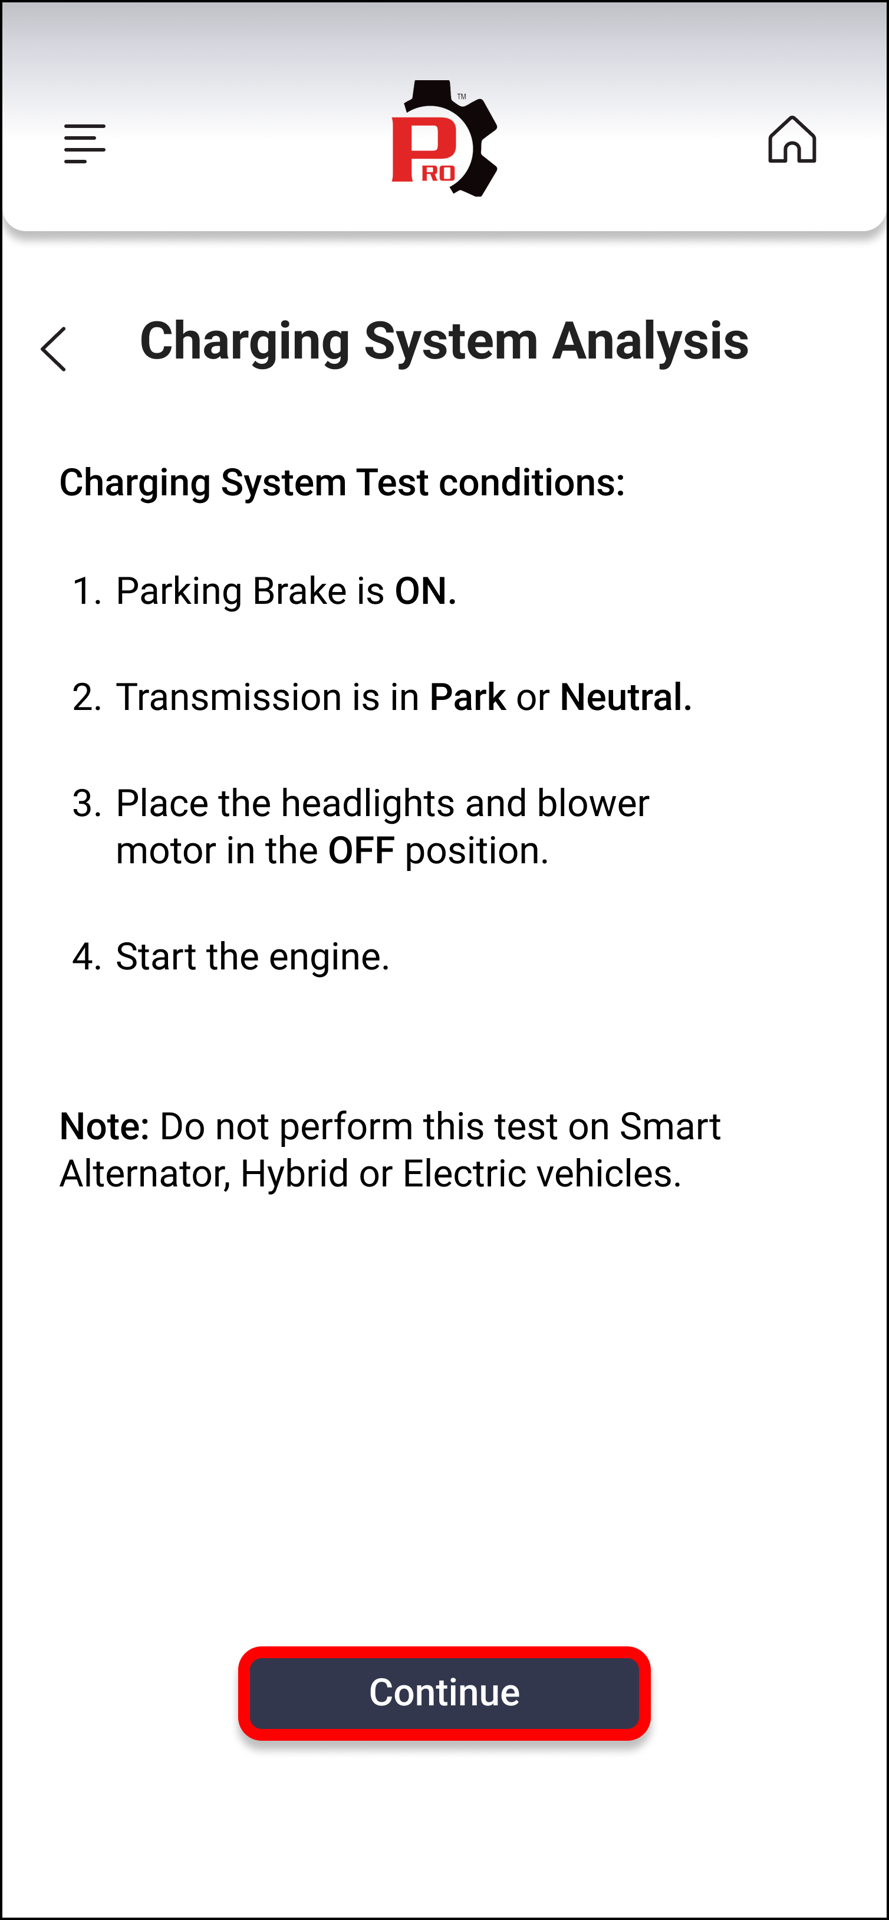
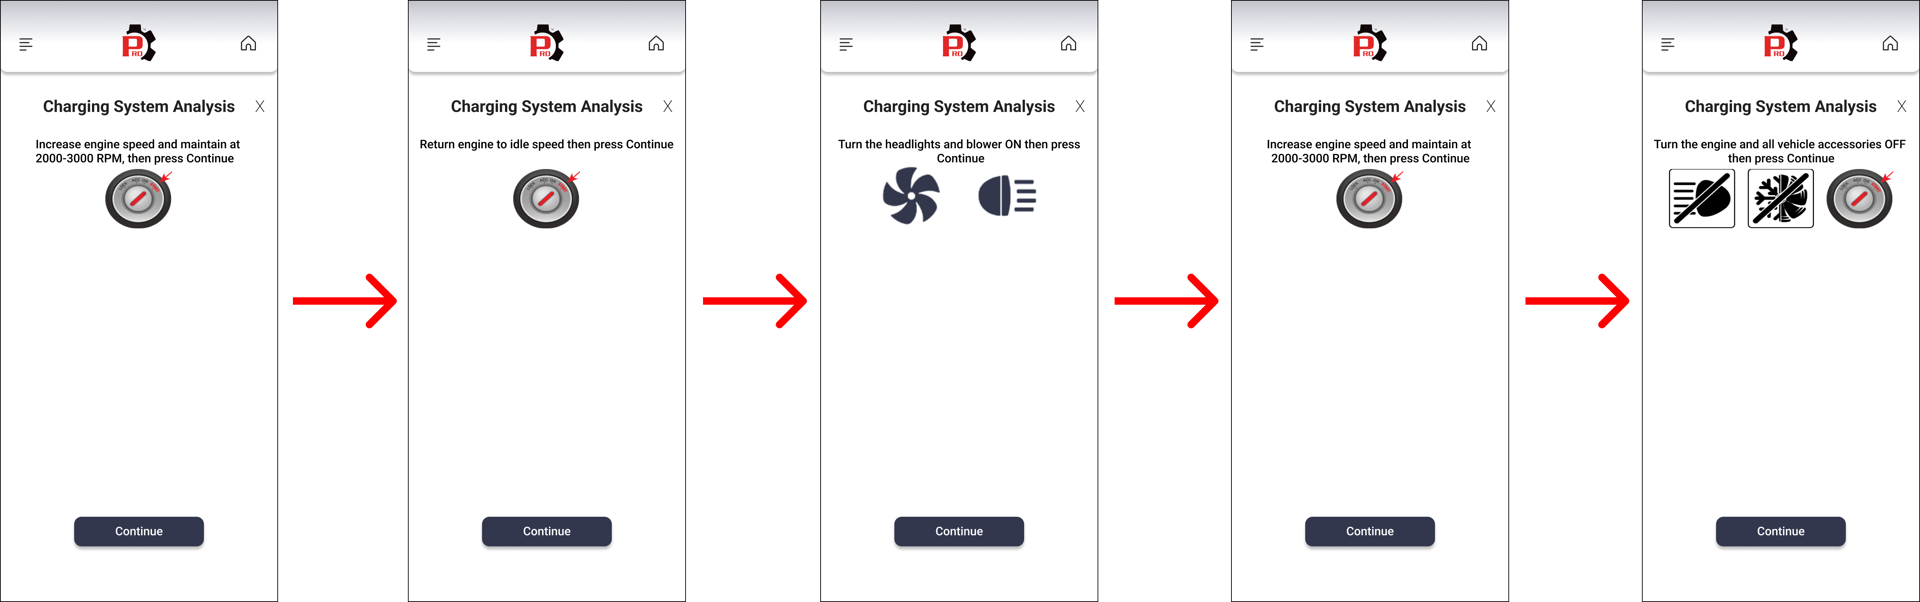
Step 3: Connect the test clamps to the battery terminals; red clamp to the positive terminal and black clamp to the negative terminal. Follow the list of Charging System Test conditions shown on the screen to prepare the vehicle for testing, then tap Continue.
Step 4: Follow the on-screen instructions to perform the test, then tap Continue.
Step 5: The Charging System Report screen displays. Tap Charging System Analysis to view the results. The screen shows the charging system voltage and indicates whether the charging system is within acceptable limits.
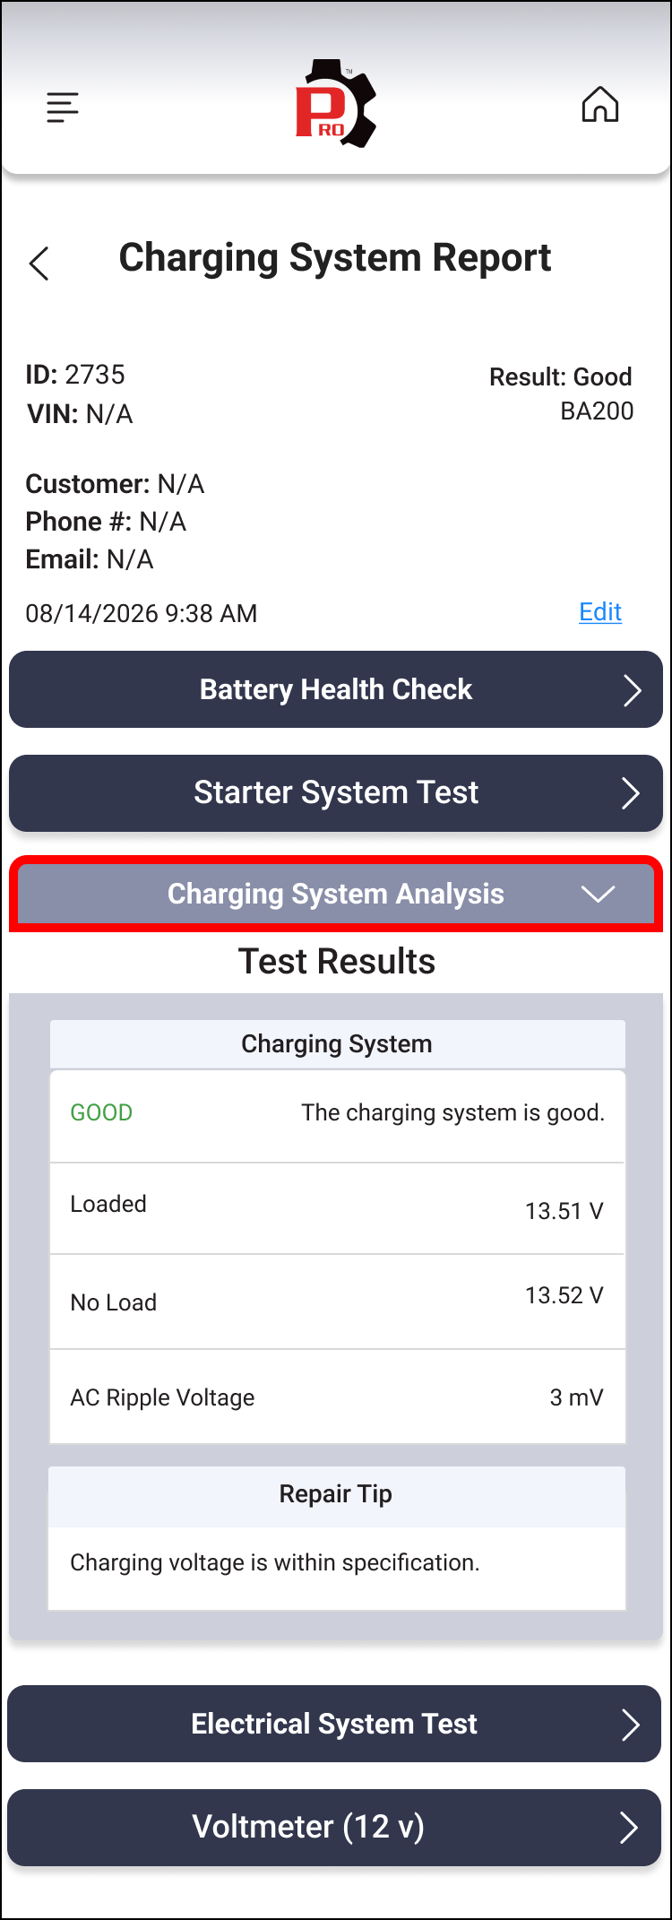
Test Result Explanation
1. Good: Indicates charging voltage is within specification.
Follow the Repair Tip to fix the issues: Charging voltage is within specification.
2. Output too low: Indicates the alternator is not providing sufficient current to charge the battery and power the vehicle’s electrical systems.
Follow the Repair Tip to fix the issues:
Check the condition of the alternator drive belts. Verify the alternator rotates while the engine is running. Replace worn or slipping belts and retest.
Inspect all charging system connections, particularly the cable connection to the battery. Clean the cable as needed. Replace the cable if damaged, then retest.
3. Output too high: Indicates charging voltage exceeds the acceptable limit.
Follow the Repair Tip to fix the issues:
Verify the ground connection is proper, and there are no loose connections.
Replace the voltage regulator or replace the alternator if it is equipped with a built-in regulator.
4. Excessive ripple: Indicates an excessive amount of AC ripple voltage has been detected.
Follow the Repair Tip to fix the issues:
The diodes in the alternator are defective or the communication diodes are damaged.
The stator is damaged.
Repair or replace parts as necessary.
5. No output: Indicates no alternator output is detected.
Follow the Repair Tip to fix the issues:
Check the condition of the alternator drive belts. Verify the alternator rotates while the engine is running. Replace worn or slipping belts and retest.
Inspect all charging system connections, particularly the cable connection at the battery terminal. Clean the cable as needed. Replace the cable if damaged, then retest.
If the cable and belts are in good condition, replace the alternator or voltage regulator.
Video Reference
Disclaimer
This content is subject to change without notice. The information has been carefully reviewed and is believed to be accurate based on our research and findings. It is intended as a guide, not a definitive procedure. We accept no responsibility for inaccuracies. Vehicle-specific test settings may be required.
Copyright 2026 IEC. All rights reserved.

