Introduction
Description: To guide you on how to perform the Over-the-Air (OTA) update feature while using the INNOVA® SDS50: Android Tablet Smart Diagnostic System.
Benefits: The OTA update function, also called OTA Update, is a function to automatically detect, download, and install the latest software, data, firmware, and OS versions directly over Wi-Fi connection. Performing the OTA Update feature keeps the Innova SDS50's vehicle coverage, diagnostic functions, and system software up to date without requiring a computer or manual file transfer. It offers a fast and convenient way to ensure your Innova SDS50 is always running on the most current and reliable version.
Preparation
Criteria to Update: Before you select Check for Updates to update your Innova SDS50, ensure that you meet the following criteria.
- Make sure that your tablet's operating system is up to date, and that your Innova SDS50 software version is an older version that needs updating.
- Your tablet is connected to a stable Wi-Fi network.
- Your tablet's battery level is above 50%. If the battery is below 50%, the tablet will not allow you to proceed with the update.
- There may be multiple updates needed for your tablet. Make sure to navigate back to your Settings and tap Check for Updates again until it indicates that no further updates are available for your tablet. Failing to do so may lead to unpredictable issues such as the Vehicle Communication Interface (VCI) not being detected, display issues, or screen flickering.
Instructions
A. Wi-Fi Connection
Automatic Internet Connection Request
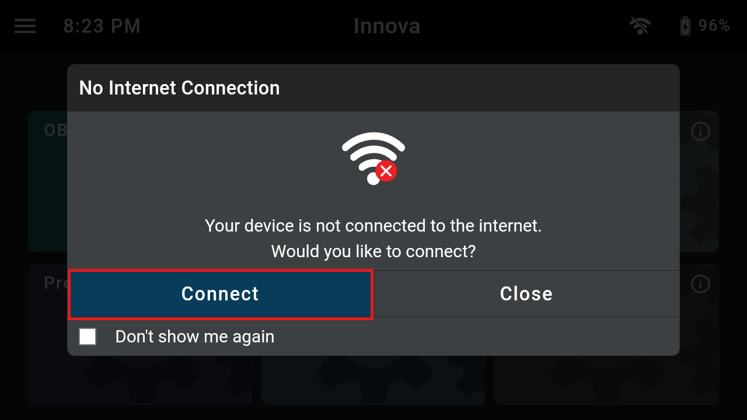
Step 1: When the Innova SDS50 is powered on without an Internet connection, a notification screen is automatically displayed. Tap Continue to open the Wi-Fi settings screen, or tap Close to connect at a later time.
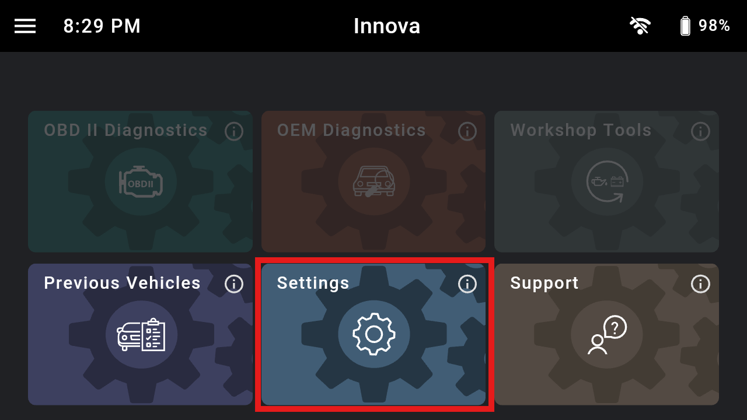
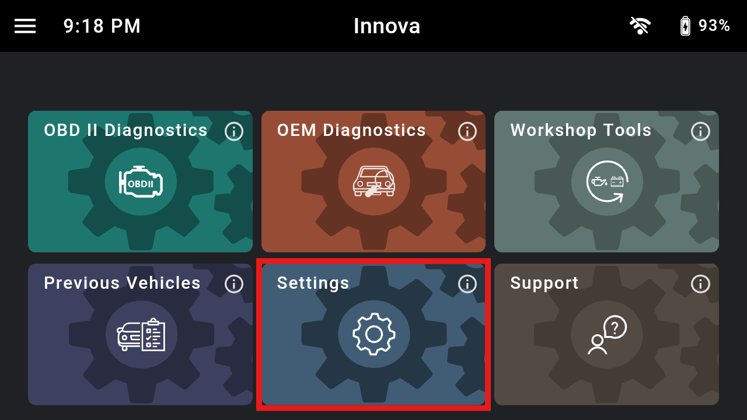
NOTE: The Wi-Fi settings can also be accessed manually through the Settings section of the tool:
- Tap Settings on the Home Screen.
- Scroll down and locate the Wi-Fi Settings panel, then proceed with the connection steps below.
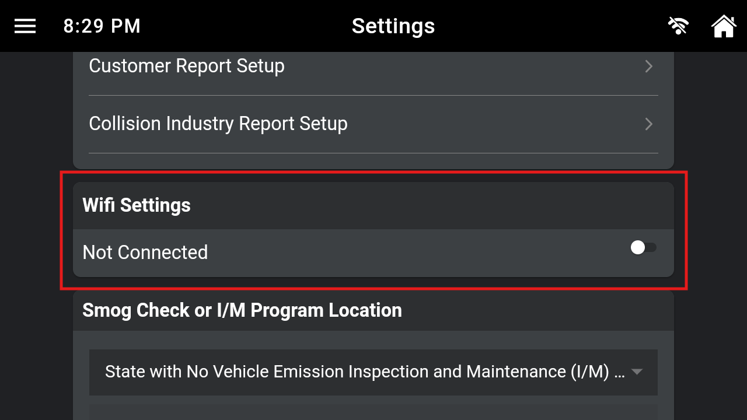
Step 2: Tap the Enable icon on the right side of the Wi-Fi panel to turn on Wi-Fi and display the list of available networks.
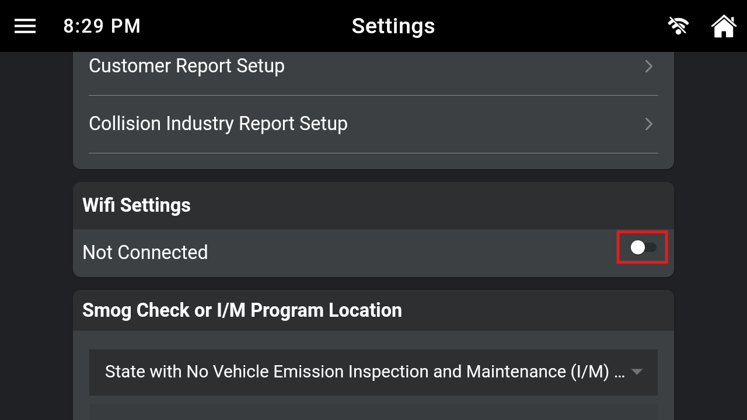
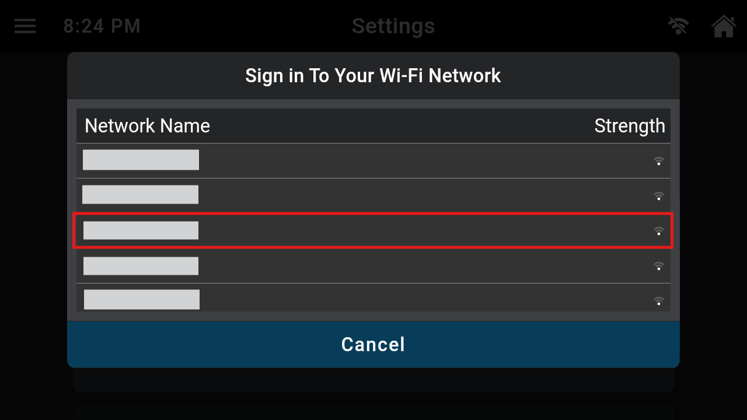
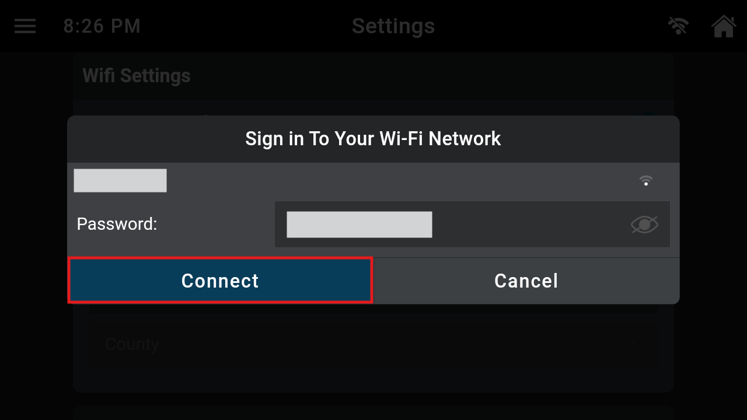
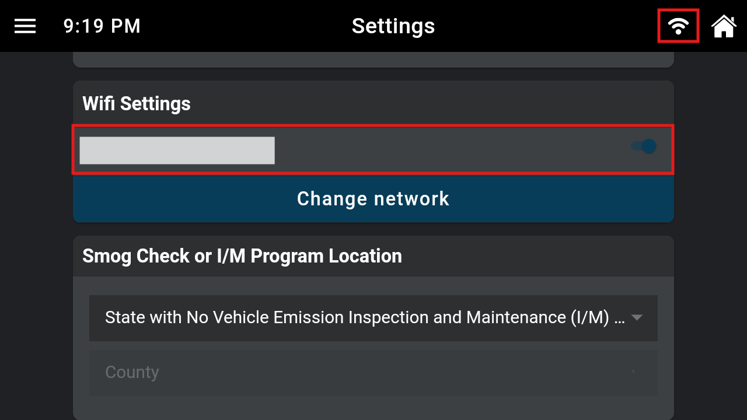
Step 3: Select the desired Wi-Fi network. Enter the Wi-Fi password, then tap Connect to complete the connection. Once the connection is successful, the connected Wi-Fi network name and Wi-Fi connection icon are displayed on the screen.
B. FW/DB/BL Update
Automatically Check for Updates
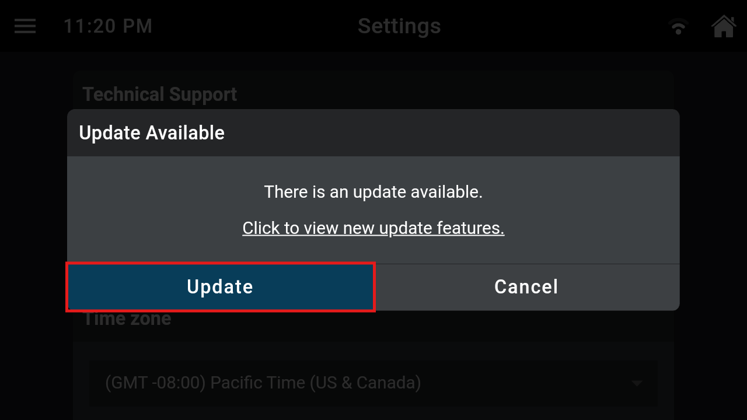
Step 1: The tablet verifies an Internet connection and checks for any updates. If an update is available, the tablet will automatically display an update notification dialog on the Home screen. If presented, simply tap the Update button to proceed, tap Click to view new update features to view the release notes, or tap the Remind Me Later button to update at a later time.
NOTE: The automatic update check is not available while the tool is connected to the vehicle's 16-pin Data Link Connector (DLC).
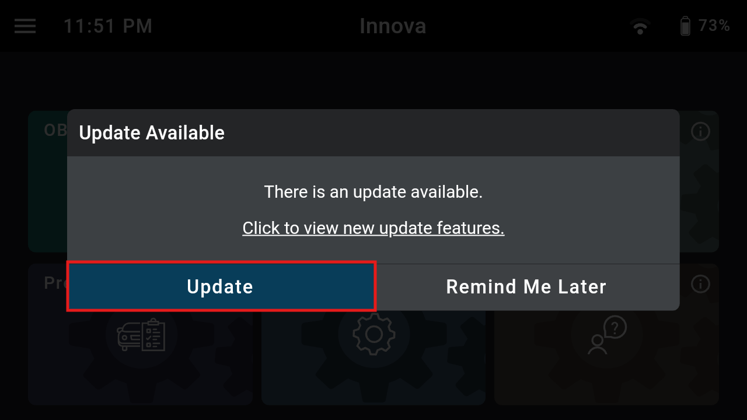
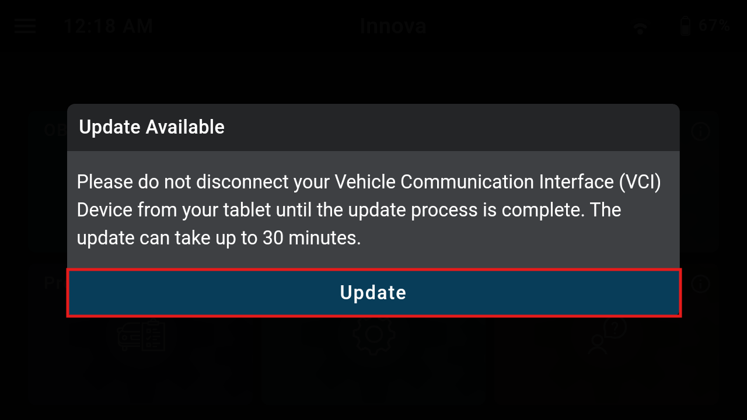
Step 2: Follow the on-screen instructions and tap Update to proceed. The download and update process may take approximately 30 minutes to complete.
Manually Check for Updates
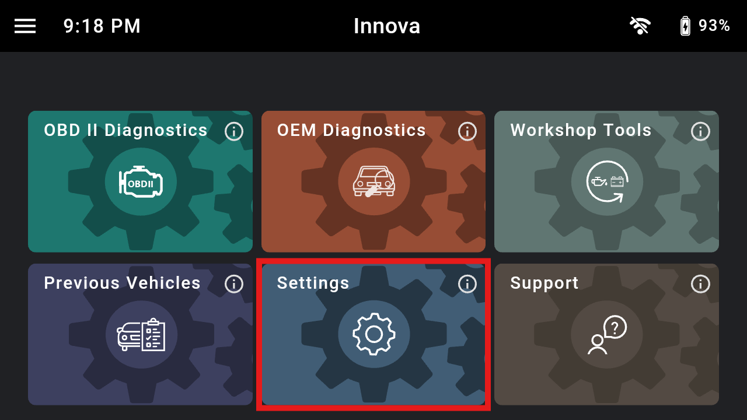
Step 1: Tap Settings on the Home Screen.
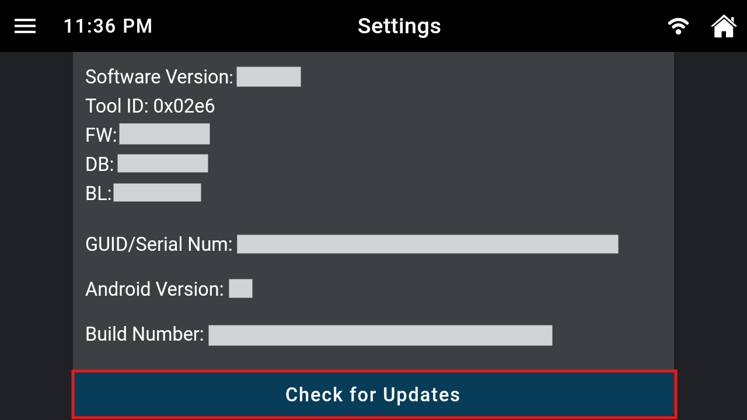
Step 2: Scroll down and locate the Version Information section, then tap Check for Updates to manually check and download any updates.
Step 3: If a new version is available, tap Update to begin the update process. Follow the same on-screen instructions described in the Automatically Check for Updates procedure. To postpone the update, tap Cancel.
C. OS Update
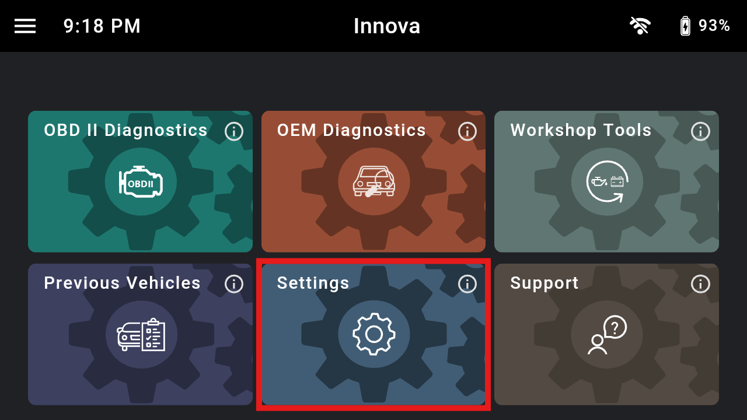
Step 1: Tap Settings on the Home Screen.
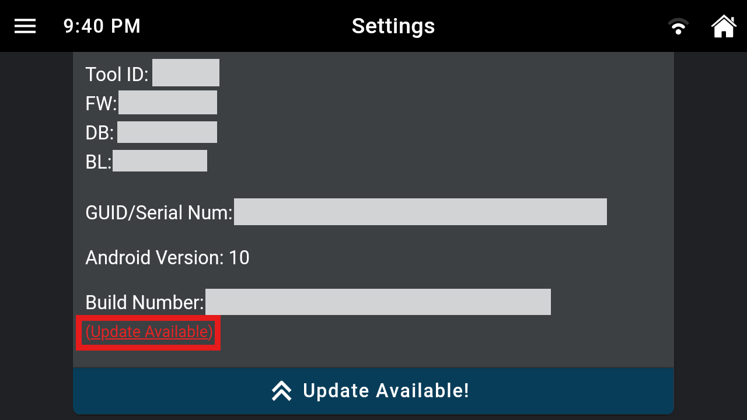
Step 2: Scroll down and locate the Version Information section, the message Update Available will display if an Operating System (OS) upgrade is available. Tap Update Available to check for and install the update.
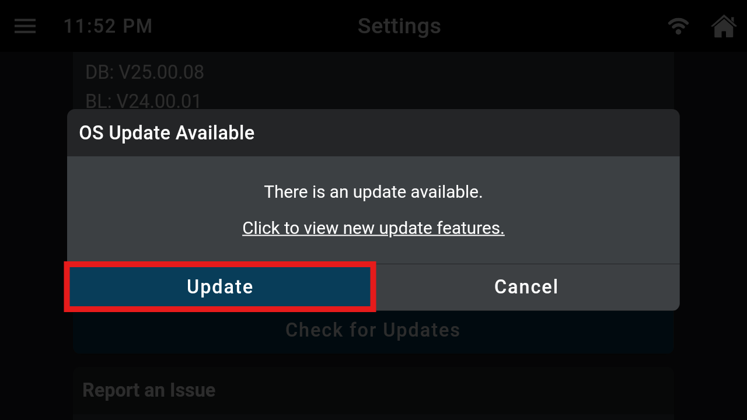
Step 3: Tap Update to begin the update process. Tap Click to view new update features to view the release notes, or tap Cancel to update at a later time.
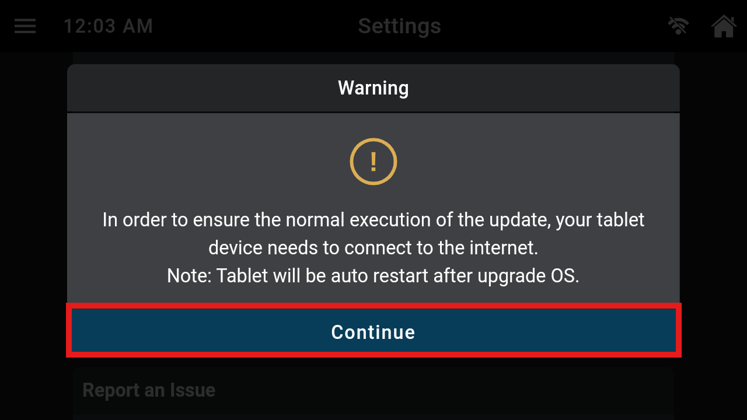
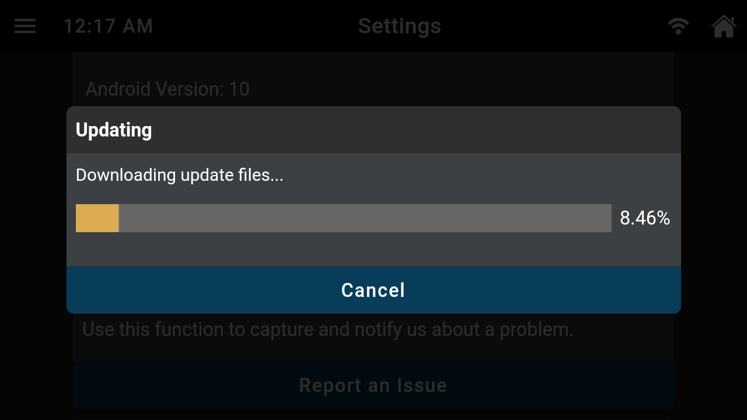
Step 4: The Innova SDS50 then verifies the Internet connection before updating. Tap Continue to proceed. The update files will then be automatically downloaded and installed.
Reference Video
This article applies to Firmware version 24.05.04

