Introduction
Description: The objective of this article is to provide a step-by-step guide on how to create a report through the Vehicle Inspection function on the Innova 7111 Smart Diagnostic System (SDS) tablet scan tool.
Benefits: As the automotive industry continues to expand, so has the use and quantity of control modules in vehicles. Consequently, identifying and correcting vehicle malfunctions has become more challenging for both mechanical and electrical issues. To perform these repairs, a Scan Tool is essential to establish communication with vehicles and retrieve Diagnostic Trouble Codes (DTCs). This is particularly important when the Malfunction Indicator Light (MIL) on the dashboard is illuminated.
Instructions
Note: This procedure is carried out on the 2023 Mitsubishi Eclipse Cross.
Step 1: Connect the Innova 7111 to the vehicle via the 16-pin Data Link Connector (DLC). Wait a moment for the AUTO-LINK process to be completed.
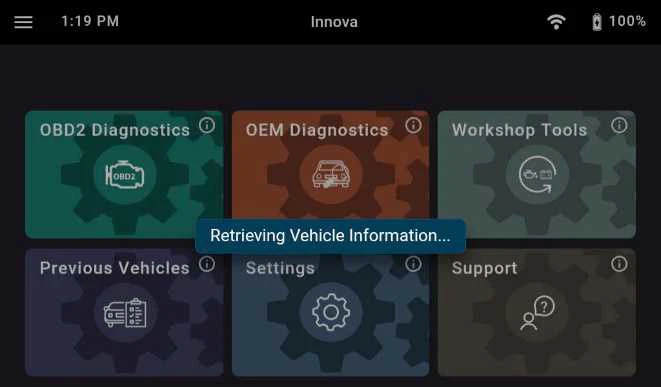
After retrieving, the Innova 7111 gets general information such as VIN, vehicle information, and odometer. Next, select the OEM Diagnostics section.
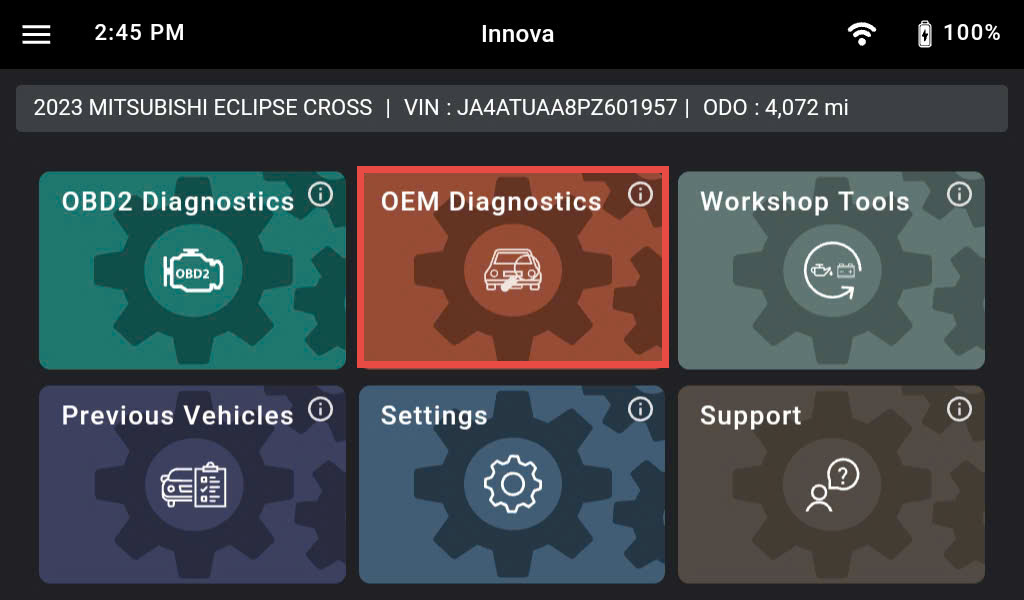
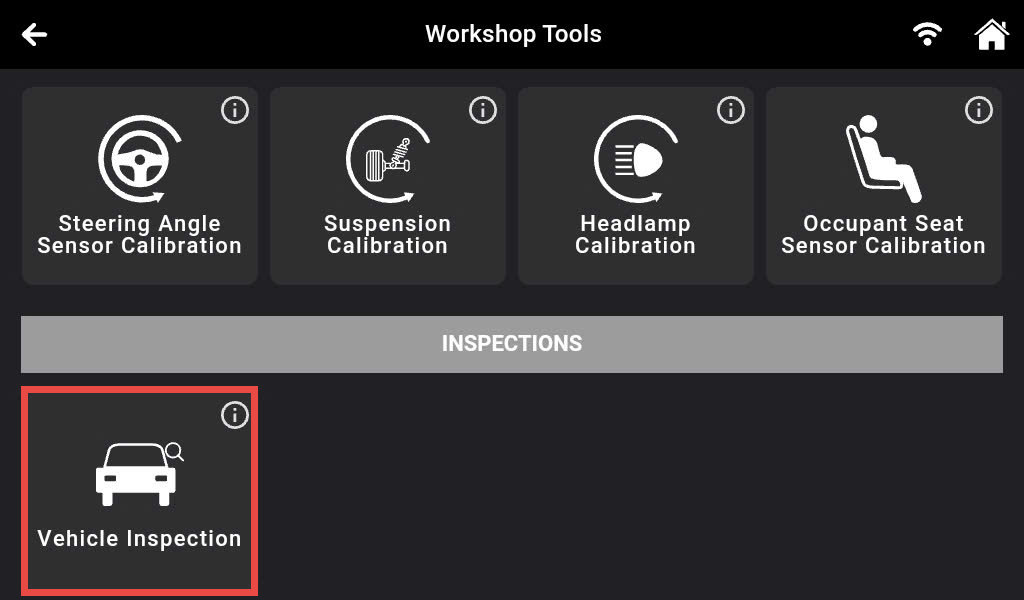
Step 2: The Innova 7111 shows a list of systems the vehicle supports. Tap the Vehicle Inspection button to access the Vehicle Inspection function.
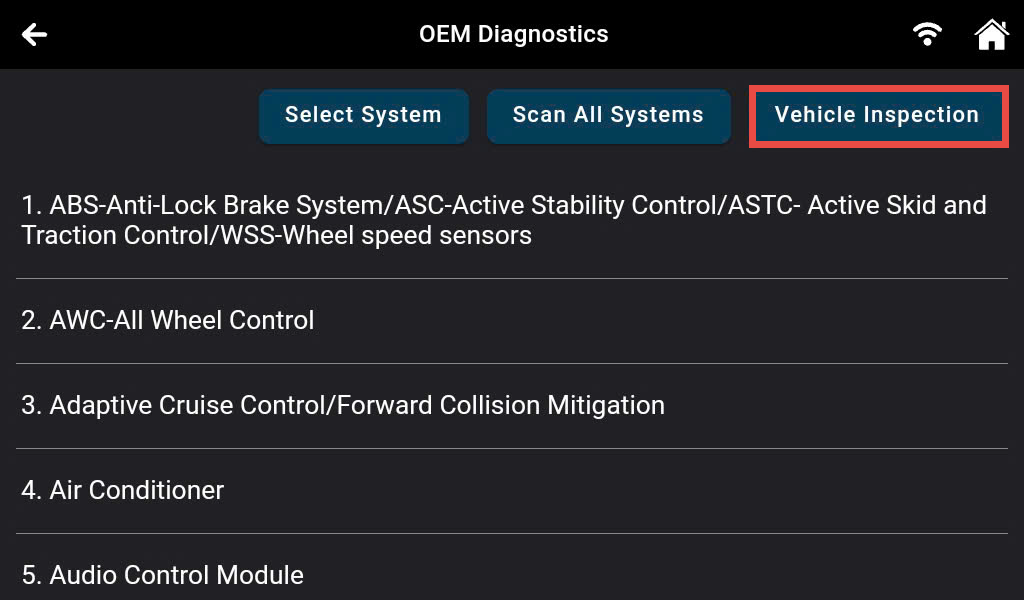
Another way to access the Vehicle Inspection feature is by tapping Workshop Tools and scrolling to tap the Vehicle Inspection section.
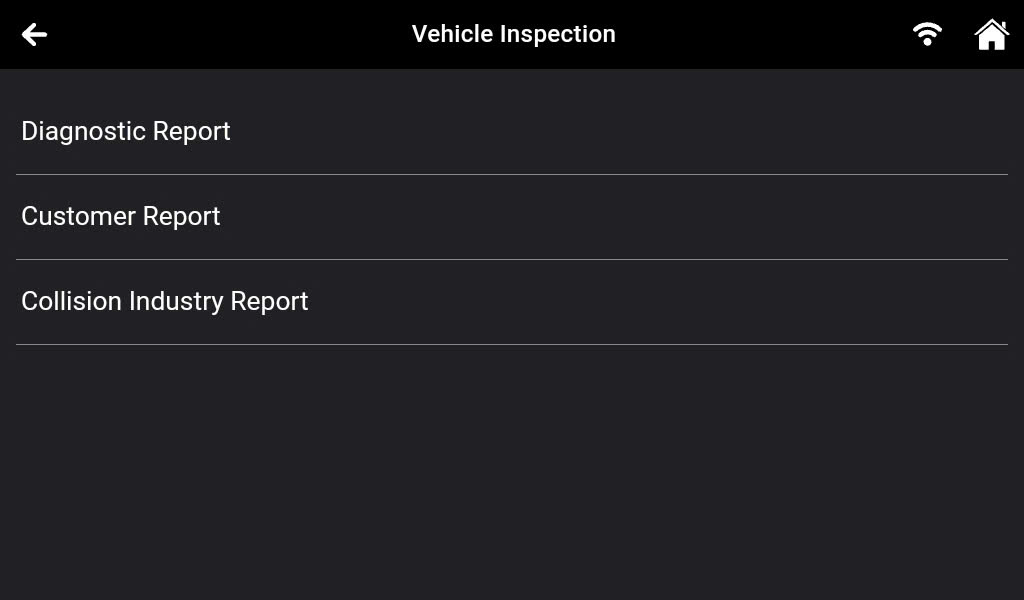
Step 3: After entering the Vehicle Inspection feature, the Innova 7111 supports three types of Business Reports, including:
Diagnostic Report – Provides a report that includes OBD II Data, MIL DTC Diagnostic Information, Scan All Systems Data (All Module Scan), and Vehicle Inspection Data.
Customer Report – Provides a report that includes OBD II Data, Scan All Systems Data, Service Check Data, Service Warning Lights, and Vehicle Inspection Data.
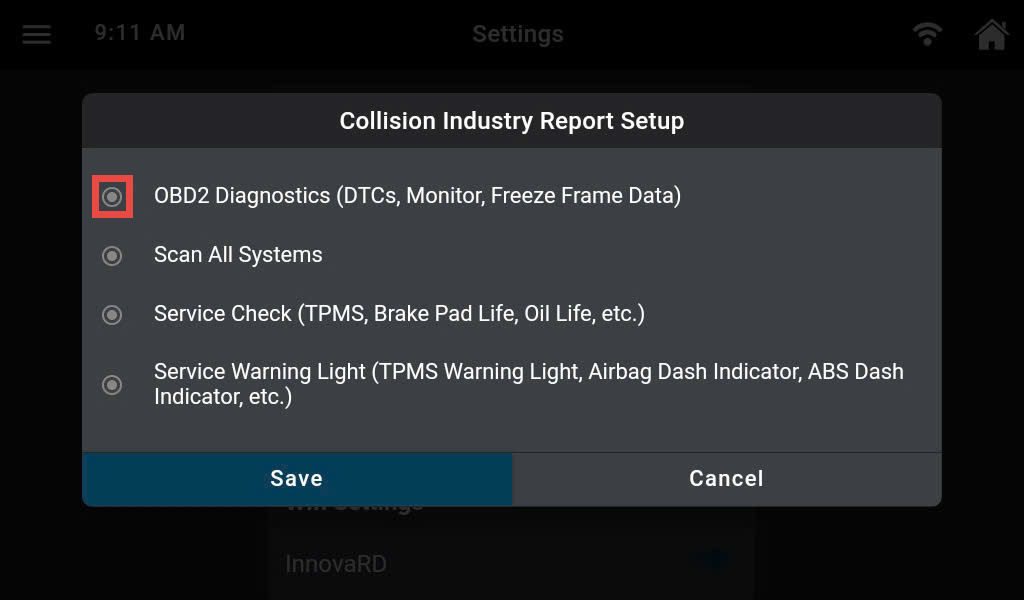
Collision Industry Report – Provides a report that includes OBD II Data, Scan All Systems Data, Service Warning Lights, and Service Check Data.
Tap the desired Business Report type.
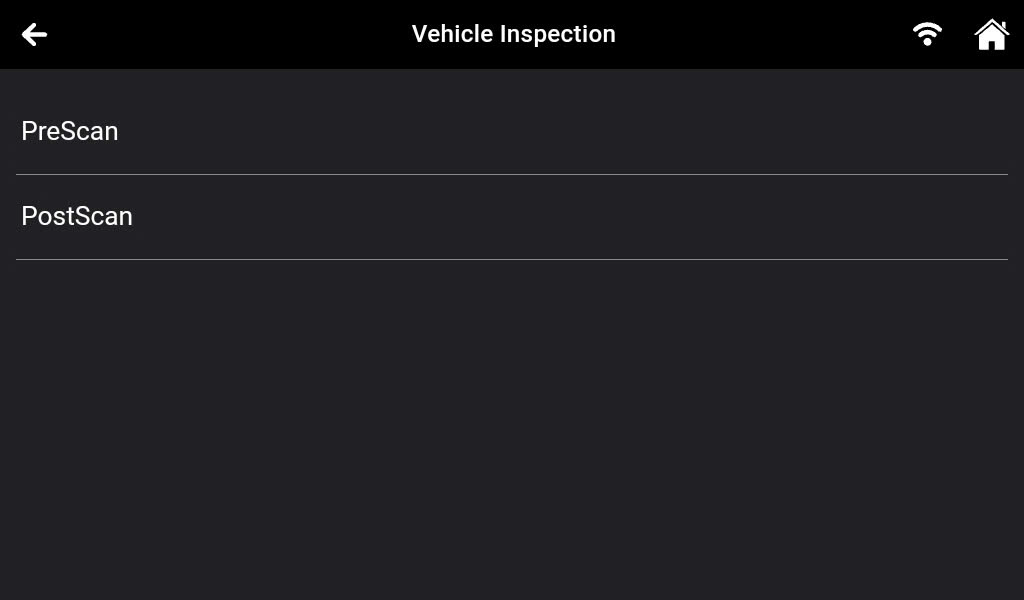
Step 4: To facilitate diagnosis and repair, the Innova 7111 provides two types of reports, as follows:
PreScan: View the vehicle’s diagnostic report before making any repairs.
PostScan: View the vehicle’s diagnostic report after completing the repairs.
Note: The PostScan report will not support if there is no PreScan.
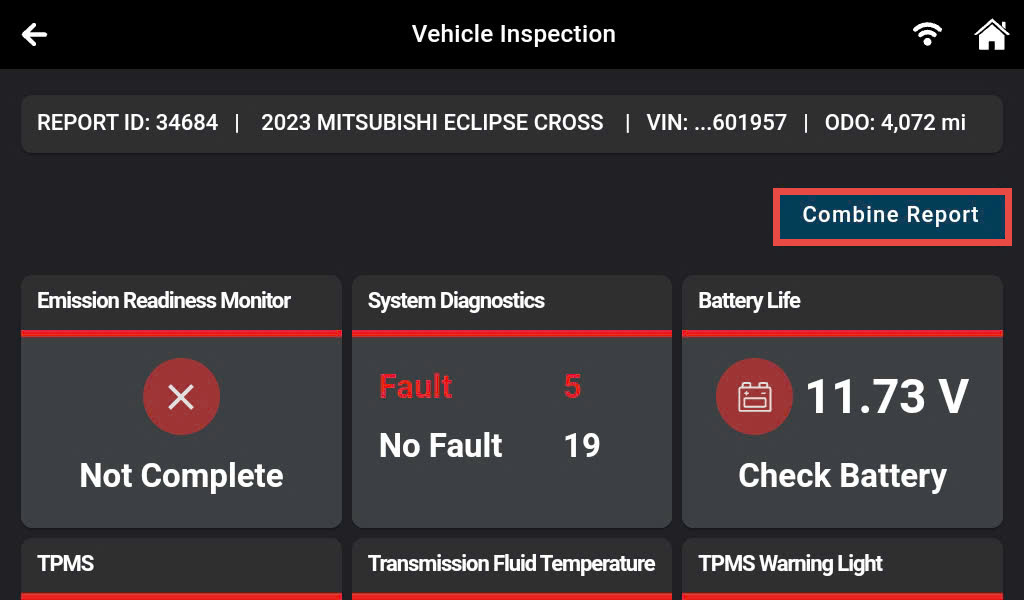
Step 5: After retrieving the data from the vehicle, the scan tool displays the report data as shown in the accompanying image.
Note: The Report Data shown varies depending on the Business Report type chosen.
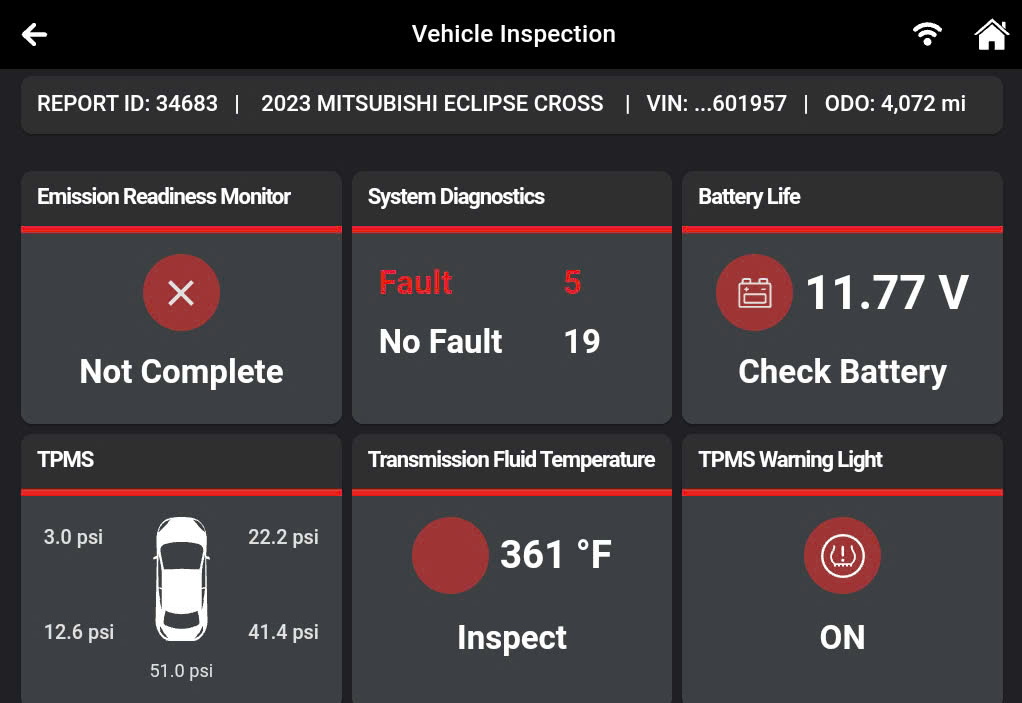
Tap the Emission Readiness Monitor section to view the OBD II Diagnostic screen.

Tap the System Diagnostics section to view the Scan All Systems results.
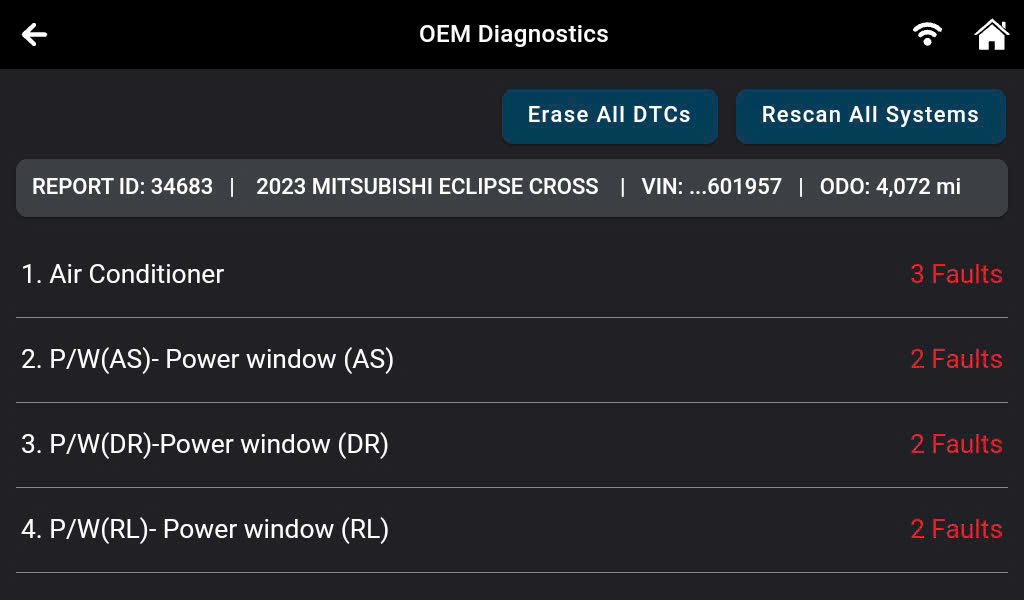
The Scan Tool displays a list of supported systems and the diagnostic result after scanning these systems, as shown in the accompanying image. Tap any system to check the result of the Scan All Systems function.
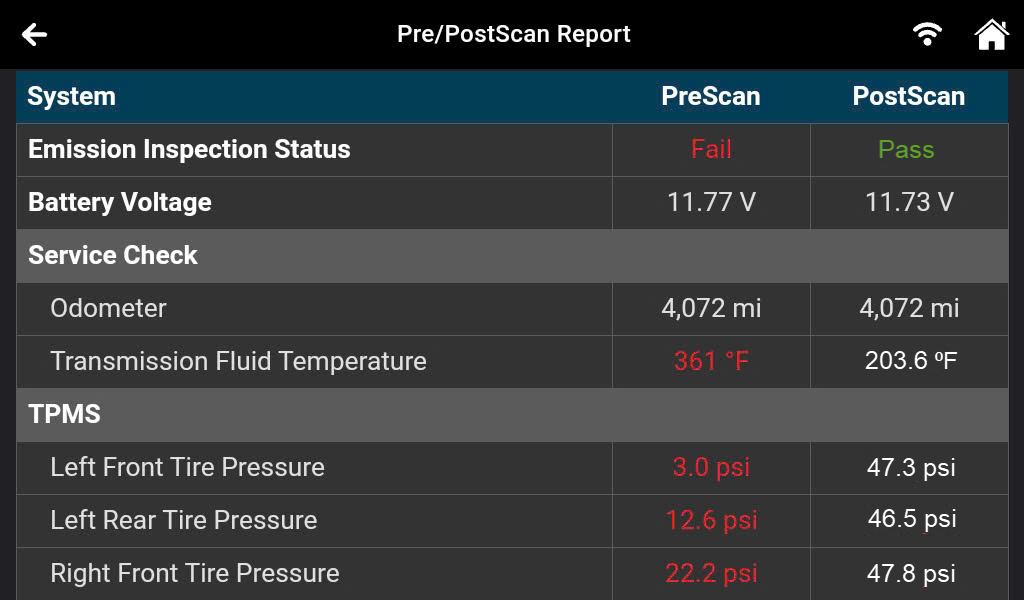
Additionally, the Innova 7111 supports the comparison of the PreScan and PostScan reports to confirm the vehicle has been successfully repaired. To access this function, tap Combine Support.
The combined report will be shown as in the table.
To save time when performing the Vehicle Inspection function, customize the features by selecting the Business Report format in the Setting section, as shown in the accompanying image.
Access the Setting section, scroll to the Vehicle Inspection Setup section, and tap the Business Report to customize.
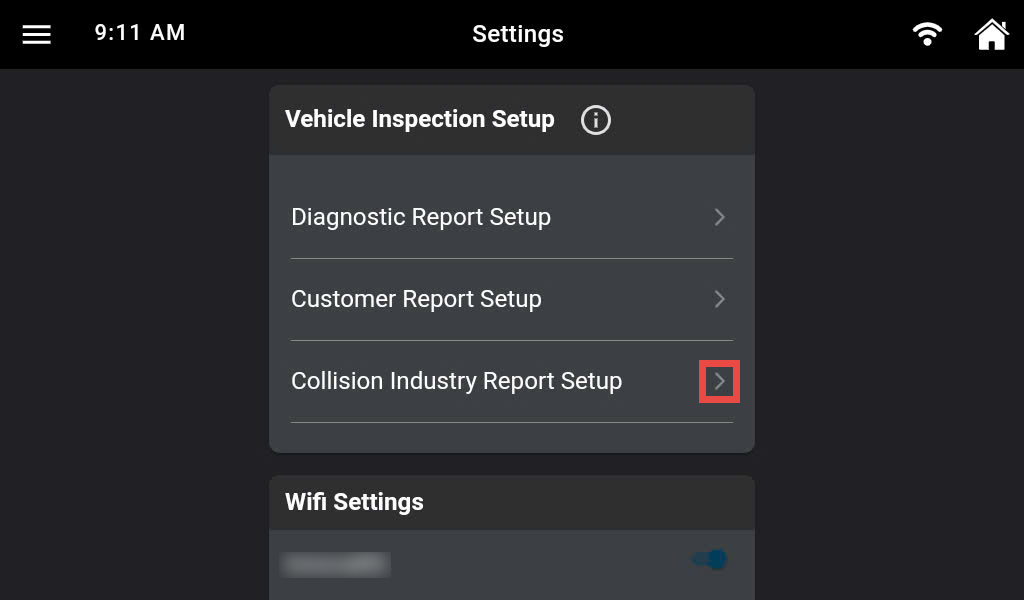
Use the button to enable/disable features as desired, then tap the Save button to apply changes.